Helping you before your schoolwork stalls

Category: time management

Breaking down projects (4.9)

When you’re assigned a project, it can sometimes feel overwhelming. One way to lessen that feeling is to break down what you need to do into manageable pieces. This poster gives you some guidance on how to do just that.
HOW TO BREAK DOWN PROJECTS

IDENTIFY KEY DATES. Look at all project due dates. Is there a rough draft or work-in-progress due date? If so, you’ll need to plan to have as full a draft of your project as possible by that date. If there is not a rough draft/work-in-progress date, then work backwards from the final project’s due date. You’ll want to finish your draft with enough time to fact-check, edit, proofread, and check that you have completed all expected aspects of the project task. Or, if it’s a presentation, you’ll need plenty of time to practice.

THINK ABOUT THE STEPS. Think about all pieces of the task, brainstorming all steps that you can think of. Make sure to consult the assignment instructions, if your instructor has provided any, because that can help you identify the steps you need to complete.

These steps can include meeting with a librarian, conducting research (which most likely takes several sessions), assembling data, outlining a report or essay, creating visuals, writing part of a text (thinking about which parts should be written first), meeting with your group (if it’s a group project), and checking the formatting of a text or object that you produce.

BE REALLY SPECIFIC. When you look at your task list, have you been clear about what you have to do with each step? If you’ve used vague terms like “work on” something, or “do” something, that’s a sign that you might not have really clarified what those steps are. If you aren’t clear in your step identification, you might struggle later to complete the tasks. 

So, if you find that you can’t clearly articulate what each task entails, visit your professor’s office hours as soon as you can so that you can acheive clarity about what you need to do with each step of the project. 

ORDER THE STEPS. Some tasks must be done before other tasks, and sometimes it’s quite clear which should come first. Those tasks are relatively easy to put in order.  

However, some tasks might not be put in order so easily. If you’re struggling to figure out task order, talk to your professor as soon as you can — their office hours are ideal for this — so that you can put the steps in good order.

SCHEDULE YOUR STEPS

ESTIMATE TIME PER STEP. How long will it take to complete each task or step? Give your estimations some careful thought, and factor in at least a bit more time for each task than you think you’d need, just to be safe.

REALLY BREAK IT DOWN. If your time estimation for a task is longer than about an hour, think critically about whether you need to break that task down further. Remember, you’ll need to complete these tasks in the time between your classes, in the evenings, and on weekends. So, you need to be realistic about how long you truly have to complete each task.

“CHUNK” THE STEPS. Will some of the steps be easier to complete if you finish them close in time to each other? If so, indicate to yourself which tasks relate to each other and schedule time to do them together. Also, can some separate tasks be done at the same time? For instance, if you’re preparing a presentation, you might be able to perform some preliminary research while you also search for images for your presentation slides. 

KEEP TO THE SCHEDULE. Working backward from the rough draft due date (or, if there is none, the final due date), you already scheduled the tasks. Keep to these deadlines as closely as you can to spread out the work effectively, and keep the project’s quality as strong as possible.

FURTHER RESOURCES 

Bowdoin College Baldwin Center for Learning and Teaching. “Breaking Down Large Projects into Manageable Tasks.”

Fort Hays State University. “Breaking Down Big Assignments and Making a Study Plan.” 

University of Massachusetts, Dartmouth. “Breaking Down Long Term Assignments.”

FACULTY FAUCET

Students will get a better grasp on project planning if you provide them with a clear set of expectations. Consider these aspects: 

  • First years may need more explicit guidance. Setting clear milestones will help reinforce to less experienced students how to section a project into smaller, more manageable pieces.  
  • More senior students can benefit from practicing this skill themselves. In higher-level courses, students might gain deeper insight into project scheduling if you ask them to submit their own project schedule plan, offering suggestions if/as needed.
  • Build in time for formative feedback. Having students submit a project draft (or perform a run-through of a talk) allows you to give them feedback before they earn a grade. This allows a chance for them to correct misconceptions or re-route a project that’s veering outside of what’s expected.

For more on helping students through project and task management, see NC State University’s “Increasing Student Success Through Effective Task Management.”
SMART goal-setting (4.5)

If you’re finding it tough to get everything done, try setting SMART goals. This goal-setting method is very widely used, so you’re likely to encounter it when you join the work force. But it can help you manage your time here at college, too! Goal-setting can help you start SMART!

WHY TRY GOAL-SETTING?

HOW GOALS HELP. Setting clearly articulated goals helps you manage your time better by helping you think through what you need to do. Having goals also helps make you accountable to yourself, particularly when you use a method like SMART goals which encourages you to make your goals realistic and manageable.

WHAT DOES “SMART” MEAN? “SMART” is an acronym to help you remember the qualities of a well-set goal. The acronym stands for specific, measurable, achievable, relevant, and time-bound. If a goal has all of these characteristics, it’s much easier to know how to work toward achieving that goal. 

SPECIFIC. If a goal is too vague, you won’t really know how to reach it. Being specific makes it much more likely that you can develop a clear plan to achieve your goal. For example, “I’ll be a better student” isn’t a very specific goal. A more specific one would be “I’ll visit my professor in office hours to talk about the upcoming exam before I take that exam.”

MEASURABLE. You have to know when a goal has been reached, or else you might spend too much time working towards it. So, “I want to get faster at typing” isn’t helpful because it’s not measurable. So, if you measure your current typing speed — let’s say it’s 30 words per minute — you can set a measurable goal by aiming for steady improvement. A more measurable goal, then, is “I want to increase my typing speed to 35 words per minute by the end of this semester.” 

ACHIEVEABLE. Unrealistic goals can be really demotivating, because it’s unlikely that you can actually achieve them. A goal like “I’m going to become an Olympic skier” is out of reach for most people. But an achievable version of that goal could be: “I’m going to ski down Sugarloaf in less than 25 minutes by the time I’m a junior.” 

RELEVANT. Your goals should align with the goals of the course you’re taking. So, if a class focuses on skills in a computer language, it’s not really relevant to set a goal for that class in which you improve your typing speed (which doesn’t have any relationship to how well someone learns a new computer language).

TIME-BOUND. Without a clear deadline, most of us will procrastinate. To help avoid that, set a deadline for every goal that you create. Stick to it! It helps to put those goals in your planner or your digital calendar, as well. 

GOAL-SETTING TIPS 

SMALLER IS BETTER. If your goal is too big, it’s probably not specific enough. If you find that you have a really big goal, try breaking it down into smaller parts. Then, make sure your goal for each sub-part is a SMART goal.

KNOW WHAT’S ACHIEVABLE. It might not be realistic in some semesters to set a goal of getting A+ in every course. And that’s okay! Knowing what’s achievable can help you focus on getting the most out of each course.

TOOLS CAN HELP. Digital project management tools like ClickUP, Trello, or Asana have free plans, and can help you keep track of goals and planning steps.

FURTHER RESOURCES 

Lake Superior State University. SMART Goals Worksheet.

Purdue Global. “Goal-Setting Strategies and Worksheets.” 2022.

Stanford University. “How to Set SMART Goals for the Academic Year.” 2023.

University of Wisconsin-Madison, University Health Services. “How to Write SMART Goals That Actually Work.” 2025.

FACULTY FAUCET

There’s evidence to suggest that goal-setting can help students in higher education. Outcomes documented in using SMART goals include that they encourage students to start earlier on assignments and report that enjoy their assignments more!

Like encouraging goal-setting but don’t like the idea of using SMART goals in your courses? Some research suggests that goal-setting of any kind provides the same benefits as SMART goal setting.

Consider including goal-setting activities to help students effectively approach their work. Students can set goals for a project, for example, to help them plan more efficiently. The goal-setting taks can be given a “check” grade to minimize your grading time, or it can even  be something that’s not graded!

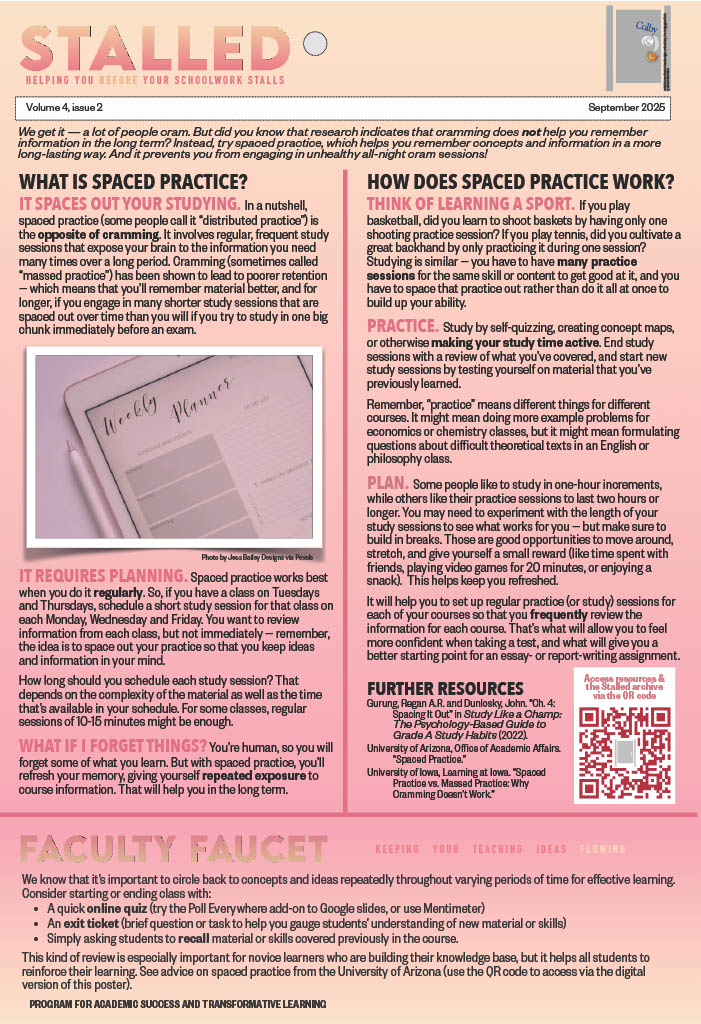
Spaced practice (4.2)

We get it — a lot of people cram. But did you know that research indicates that cramming does not help you remember information in the long term? Instead, try spaced practice, which helps you remember concepts and information in a more long-lasting way. And it prevents you from engaging in unhealthy all-night cram sessions!

WHAT IS SPACED PRACTICE?

IT SPACES OUT YOUR STUDYING. In a nutshell, spaced practice (some people call it “distributed practice”) is the opposite of cramming. It involves regular, frequent study sessions that expose your brain to the information you need many times over a long period. Cramming (sometimes called “massed practice”) has been shown to lead to poorer retention — which means that you’ll remember material better, and for longer, if you engage in many shorter study sessions that are spaced out over time than you will if you try to study in one big chunk immediately before an exam.

IT REQUIRES PLANNING. Spaced practice works best when you do it regularly. So, if you have a class on Tuesdays and Thursdays, schedule a short study session for that class on each Monday, Wednesday and Friday. You want to review information from each class, but not immediately — remember, the idea is to space out your practice so that you keep ideas and information in your mind. 

How long should you schedule each study session? That depends on the complexity of the material as well as the time that’s available in your schedule. For some classes, regular sessions of 10-15 minutes might be enough.

WHAT IF I FORGET THINGS? You’re human, so you will forget some of what you learn. But with spaced practice, you’ll refresh your memory, giving yourself repeated exposure to course information. That will help you in the long term.

HOW DOES SPACED PRACTICE WORK?

THINK OF LEARNING A SPORT. If you play basketball, did you learn to shoot baskets by having only one shooting practice session? If you play tennis, did you cultivate a great backhand by only practicing it during one session? Studying is similar — you have to have many practice sessions for the same skill or content to get good at it, and you have to space that practice out rather than do it all at once to build up your ability. 

PRACTICE. Study by self-quizzing, creating concept maps, or otherwise making your study time active. End study sessions with a review of what you’ve covered, and start new study sessions by testing yourself on material that you’ve previously learned.

Remember, “practice” means different things for different courses. It might mean doing more example problems for economics or chemistry classes, but it might mean formulating questions about difficult theoretical texts in an English or philosophy class.

PLAN. Some people like to study in one-hour increments, while others like their practice sessions to last two hours or longer. You may need to experiment with the length of your study sessions to see what works for you — but make sure to build in breaks. Those are good opportunities to move around, stretch, and give yourself a small reward (like time spent with friends, playing video games for 20 minutes, or enjoying a snack).  This helps keep you refreshed.

It will help you to set up regular practice (or study) sessions for each of your courses so that you frequently review the information for each course. That’s what will allow you to feel more confident when taking a test, and what will give you a better starting point for an essay- or report-writing assignment.

FURTHER RESOURCES 

Gurung, Regan A.R. and Dunlosky, John. “Ch. 4: Spacing It Out” in Study Like a Champ: The Psychology-Based Guide to Grade A Study Habits (2022).

University of Arizona, Office of Academic Affairs. “Spaced Practice.”

University of Iowa, Learning at Iowa. “Spaced Practice vs. Massed Practice: Why Cramming Doesn’t Work

FACULTY FAUCET

We know that it’s important to circle back to concepts and ideas repeatedly throughout varying periods of time for effective learning. Consider starting or ending class with:

  • A quick online quiz (try the Poll Everywhere add-on to Google slides, or use Mentimeter)
  • An exit ticket (brief question or task to help you gauge students’ understanding of new material or skills)
  • Simply asking students to recall material or skills covered previously in the course. 

This kind of review is especially important for novice learners who are building their knowledge base, but it helps all students to reinforce their learning. See advice on spaced practice from the University of Arizona (use the QR code to access via the digital version of this poster).

Preparing to come to Colby (digital-only edition)

Welcome to Colby! And welcome to “Stalled,” a poster series that provides suggestions to help you maximize your academic success. Why is it called “Stalled?” We hope to give you advice before your schoolwork stalls. Also, you’ll find these posters in the bathrooms stalls of academic buildings several times each semester! 

PREPARING TO COME TO COLBY 

SCHEDULE IT IN. You’ve received your Fall ’25 class schedule over the summer. So, schedule all class times in your calendar. We suggest that you familiarize yourself with Google Calendar, since Colby uses Google’s suite of software. If you need help, see the Stalled poster from February 2024 on Google Calendar by using the QR code or link to the Stalled archive at the bottom of this poster.

BE READY TO STUDY. To know how much time to devote to each class, you need to know that every 1 hour of class time requires 2-3 hours of study/work time. So, if you have a 3-hour class, expect to spend about 9 hours a week studying, doing homework, and completing assignments for that one class. It’s a good idea to schedule that work/study time on your calendar so that you know that you’re giving each class its due attention. 

READ ORIENATATION MATERIAL. You’ll have a lot of information given to you during your orientation, so be ready to organize that material. Know that you’ll receive some paper resources during orientation, so have a binder or large plastic envelope to store it in. And bring a notebook to take notes during orientation sessions.

COMPLETE ONLINE ORIENTATION. Colby’s online orientation is created to get you ready for in-person orientation, because we know that leaving home for college is a big transition! So be sure to complete the online orientation tasks so that you can make the most of the in-person orientation.

WHAT TO DO WHEN ON CAMPUS

GET TO KNOW THE CAMPUS. During orientation, explore spots on campus like the Harold Alfond Athletics and Recreation Center and Miller Library. Make sure also to find the classrooms for each of your courses, once they’ve been assigned later this summer. Need help finding a room or building? Ask your orientation leader!

MEET PEOPLE. Orientation is a great time to get to know your fellow first-year students! You’ll also have opportunities to meet other students, staff members, and faculty. Ask fellow new students about what classes they’ll be taking, and ask folks who’ve been around Colby longer about Colby traditions, their favorite spots on campus, or which cafeteria they like best.

UPDATE! Once you know when your major tests happen and assignments are due (which you’ll find out when Fall ’25 starts), add them to your Google calendar. Then, be sure to schedule work and study time for them. Yes, we do recommend blocking off time in your calendar to study for exams (hint: a regular study session for each class will be more effective, and less stressful, than trying to cram right before an exam!). Be sure to change your calendar right away if any changes to those dates are announced in any of your classes.

DON’T OVERDO IT.It would be easy to overpack your schedule with lots of club meetings, sports events, performances, and other activities. Such events are great ways to meet people and develop your knowledge, so do take advantage of them! But pay attention to your energy levels and available time, and don’t do so many things that your schoolwork — or self-care — suffers.

FURTHER RESOURCES 

Every issue of Stalled contains resources and/or related references, as well as a link to the Stalled archive.

Cherry, K. “How to Start a Conversation.” VeryWellMind, 2023. 

Colby College. Campus Interactive Map.

Colby College First-Year Experience. Orientation.

Colby College. Office of Campus Life. 

Google. Get Started with Google Calendar.

Stalled archive, listed by subject.

University of Pittsburgh. Time Management Calculator.

Group presentations (3.12)

Successful presentations involve a lot of planning and careful thought, and presenting in groups offers some additional challenges. These suggestions on planning and execution can help enhance your next group presentation. And be sure to schedule time for the whole group to practice at least 2 full run-throughs!

GROUP PRESENTATION PLANNING

CLEARLY DELEGATE TASKS. Every presentation should be carefully planned, but planning takes on added importance when you’re working in a group. One way to allocate tasks fairly is to create a shared planning document.Using a platform like Google Docs allows all members of the group access to the same document. 

On this document, list all tasks that must be undertaken to complete the creation of the presentation. Be specific, and include everything from research and the creation of tables and figures to slide creation and editing. Specify the different parts of the presentation, and allocate the tasks as fairly as you can, based on equality of workload and taking into account different skills and interests. Indicate the name of the person who will complete each task, and create a column with checkboxes to indicate when a task is done. If a task has to be completed by a certain date, indicate that date on the same document (a table is a good format in which to create this list).

Keeping a shared planning document helps everyone know the progress of all parts of the presentation. Additionally, if anyone becomes sick, or if the initial allocation of tasks demanded more work of some group members, this document will allow the group to re-allocate tasks when/if needed. 

Remember, too, that all group members should speak for roughly the same amount of time (unless the instructor specifies otherwise), so you’ll need to divide up the speaking roles for the group members fairly.

VISUAL UNITY. Before anyone creates any slides for the presentation (if the presentation will have visuals), decide as a group on what the slides should look like. Aim for consistency across all of the slides. Together, decide:

  • Is there a shared template that everyone should use, and if so, does everyone have access to it?
  • What color palette will the group use? If figures need to be created, make sure the people creating them know what colors should be used.
  • About how much text should appear on any one slide? Remember not to crowd the slides with too much text.
  • If animations are used, which type(s)?
  • What font will the group use?
  • Will the group use a particular kind of illustration style (icons, background, photographs, other)?

PRESENTING IN A GROUP

HANDOFFS. How will you transition from one speaker to the next? You might simply memorize the last line that the speaker before you says. Alternatively, you might mention the next presenter by name as a way to cue them (e.g. “Next, Emma will provide an overview of this theory’s development throughout the 19th century”). Make sure all group members know the plan.

PRACTICE TOGETHER. Practice together as a group, completing at least 2 full run-throughs of the presentation (more, if you have the time). This will let you see how the different slides work together, and you will practice how transitions work between speakers. Practicing will also allow you to decide how to advance the slides — will each person advance their own slides?

NON-SPEAKING TIME. Where will you stand when you are not speaking? Make sure that no one blocks the projected slides, either when they’re presenting or when they’re not. Ensure that you direct your attention to whomever is speaking so that you’re a supportive group member, too. When practicing, plan out where you’ll stand so that moving when changing speakers will go smoothly during the actual talk.

FURTHER RESOURCES 

Hamilton College Oral Communication Center. “Presenting in a Group.”

University of Texas at San Antonio. “5 Tips for a Group Presentation.”

Wharton School of Business, University of Pennsylvania. “Tips for Team Presentations.”

The Study Cycle (3.2)

You might have good study skills, but did you know that there are researchers who study the science of learning? They recommend regular use of the study cycle, which is described below. Try it to give yourself the best chance for academic success, and build the study cycle into your semester plans!

WHAT IS THE STUDY CYCLE?

ITERATIVE PROCESS. The study cycle is a process through which students can engage in deep, rather than surface or short-term, learning. It includes 5 components that you repeat for each class session (see image on poster).

PREVIEW. In this phase, students skim readings, noting headings as well as key terms, and review any summaries and reading/chapter objectives. In reading-heavy classes (like literature courses), students complete assigned readings, noting any connections to or contrasts with previous course readings. This stage also consists of creating questions to bring to class.

ATTEND. When in class, ask meaningful questions, voice ideas in discussion, and take careful notes.

REVIEW. As soon after class as possible, look at your notes, filling in any gaps, and note any areas of confusion as well as any questions you have.

STUDY. Schedule several intense study sessions per class per week, including devoting time to course readings. For courses with problem sets or frequent homework assignments, ideally schedule several short sessions per day. Ask “why,” “how,” and “what if” questions, making connections with other course ideas and even with ideas from outside of your course.

ASSESS. Perform regular reality checks. Are you using study methods that are effective? The best way to check for this is to ask yourself: do you understand the material enough to teach it to others? If not, try different methods (ask your professor or learning assistant if you are stuck and don’t know what else to try).

INTENSE STUDY SESSIONS

SCHEDULE THEM! Putting your study sessions into your calendar helps you see how much time you need for studying, and how much time you have available for extracurriculars/non-academic events. It’s important to stick to your schedule so that you give yourself the greatest chance of doing well in your courses and maximizing your learning.

BREAK IT DOWN. Break each study session down into 4 parts: goal setting, studying with focus, rewarding yourself, and reviewing (see image on poster).  Goal setting, which takes about 2 minutes, involves deciding what you want to accomplish in your study session. Studying with focus involves 30-50 minutes of interacting with course material, including reading, organizing, concept-mapping, summarizing, processing, re-reading, and reflecting. Rewarding yourself takes the form of a 10-minute break, such as texting a friend, getting a snack, stretching, or otherwise resting your mind. Each study session ends with about 5 minutes of actively reviewing what you just studied.

FURTHER RESOURCES

Johns Hopkins University. Academic Support.“The Study Cycle.” 

McGuire, Sandra Yancy. Teach Students How to Learn: Strategies You Can Incorporate Into Any Course to Improve Student Metacognition, Study Skills, & Motivation. Stylus Press, 2015.

University of North Carolina at Chapel Hill’s Learning Center. “The Study Cycle“.

Time management techniques (2.7)

Managing your time helps you fit your work into your schedule while preserving time for healthy pursuits and self care. Different people find different time management techniques helpful, so here are two of the most popular techniques. Try both, and continue using the one that works best for you. Ask friends what technique they use!

POMODORO TECHNIQUE

This time management technique was developed by Francesco Cirillo, who had a kitchen timer shaped like a Pomodoro tomato. It involves breaking tasks into brief concentrated bursts of work alternating with breaks.

WORK IN BURSTS.When you have a task, set a timer and work on the task for 25 minutes. After that, take a 5-minute break to refresh your mind, and then complete 3 more work sessions (making sure to follow each with a 5-minute break).

ONE AT A TIME.One element of this technique is that each work session, called a “Pomodoro,” is devoted to one and only one task. In fact, if you have a big project, you’d need to tackle only one small piece of it during one Pomodoro. Don’t start another task before you complete your current Pomodoro. 

BREAKS ARE FOR REST.During your break times, don’t do anything related to your work. The break time is an important part of this technique because it gives you a chance to refresh yourself after engaging in something that is cognitively demanding. After four Pomodoros, take a longer break — the recommended length for this break is between 15 and 30 minutes.

PLAN AHEAD. Before you set aside your work and sleep (or go to a class, or whatever), jot down a couple of notes about what you will need to do next. That way, you can jump straight into your next Pomodoro because you already know what you need to do to get started.

FLOWTIME TECHNIQUE

If the Pomodoro Technique feels like it interrupts your workflow, then the Flowtime Technique, created by Zoe Read-Bivens, might work better for you.

BREAK IT DOWN. Break down your project into small steps or manageable sub-tasks. Aim for each step/sub-task to be realistically completed in one work session (though you might have to guess initially as to how long things might take). Have a goal for each step/sub-task to help you maintain a sense of purpose. Next, prepare a distraction-free workspace: gather all of the resources you’ll need and remove anything that might pull your focus away from the task (yes, including your phone). Finally, designate a paper or digital document in which you keep a list of your work session duration.

KEEP A LIST. Start by working on one step or sub-task until you become distracted or until you feel like you need a break. Keep a list of your start time and your end time for each step, as well as the duration of any breaks you take. In that list, also note what you accomplished.

WHEN TO TAKE A BREAK? Timing and length of breaks are up to you, but be realistic and don’t use breaks just to procrastinate. If you become distracted for more than 30-45 solid seconds, that’s a sign to take a break. Other signs that you need a break include: running out of ideas,, feeling mentally tired, feeling frustrated, or you’ve completed a step, sub-task, or task. 

TRACK YOUR TIME. Engaging in the Flowtime Technique for a week means that you will have a list full of information about your “flow” spans. Knowing when you have tended to take a break during work times will allow you to schedule your time more effectively in the future. Use the “Daily When Tracker,” which you can access via the link below in the “Further Resources” section.

STRATEGIZE. As with the Pomodoro Technique, write yourself a note about what you’ll need to do in your next study session. And look at what you’ve accomplished! Let it inspire you to keep going!

FURTHER RESOURCES 

Ho, Leon. “Pomodoro Technique.” Lifehack. 2023. 

Pink, Daniel. “Daily When Tracker.”

University of Tennessee at Chattanooga. “How Can the Flowtime Technique Help Me?“

Google Calendar Tips (2.6)

As we start a fresh new semester, using a digital calendar can be an immense help with your time management. Here are tips to get started, and if you already use a digital calendar, maximize your use of it! Because Colby uses Google Suite, this advice specifically relates to Google calendar – but similar options exist with most any digital calendar.  Most professional settings use digital calendars, so get familiar with them now!

WHAT TO PUT IN YOUR CALENDAR

CLASS TIMES. Add each of your classes and lab sessions to your calendar. But you don’t have to add each one manually! When adding your first History class, for example, look for the phrase “Does not repeat.” You have the option to change that to a “recurring event,” occuring weekly. You can also pick an end date, which should be the last class session of the semester. If your professor cancels any class, you can delete it from your calendar — but be sure to cancel “only this event” rather than “this and following events” or “all events.”

MEAL & SLEEP TIMES. To be at your best, you need to make healthy choices, including making time for breakfast, lunch, and dinner as well as sleep. So, schedule mealtimes and sleeping time on your calendar to help remind you to maintain healthy habits.

“DOWN” TIME. You need time to recharge your batteries, so make sure to earmark some time for leisure/mental decompression. Yes, actually schedule it! That will help you stick to it.

ASSIGNMENT DUE DATES. Since you have many writing assignments, exams, problem sets, and other academic work due at many different times, enter each one into your calendar so that you can schedule your time effectively — and not miss any deadlines.

STUDY TIME. In order to keep up with your work, you need to schedule regular study time. For most courses, you’ll need about 2-3 hours per credit hour a week. That’s right — you should practice, review, and study even in those weeks when you don’t have a test. 

SOCIAL/CLUB/SPORT EVENTS. Adding your extracurricular activities to your calendar is important to show you when you’re busy, and also to let you see if you are overcommitting yourself. Further, if a sporting event takes place during a scheduled class time, you should contact your professor well ahead of time to make any necessary arrangements. 

BIRTHDAYS & HOLIDAYS. Add your friends’ and family birthdays so you don’t miss any celebrations. Google also lets you add national holiday calendars, so you can add the “Holidays in United States” events — or holidays for any other religion or country (which is essential if you will be traveling and/or studying abroad).

GOOGLE CALENDAR TIPS

COLOR CODE. You can make each of your classes display with a different color in your calendar if you find that helpful. Alternatively, you can have one color for class time, another color for assignment due dates/times, and yet another color for social events. Make it work for your needs and preferences!

CREATE REMINDERS. Rather than create a reminder manually for every event, adjust the settings to create reminders for all events. From your calendar, click the gear icon in the top right corner and select “Settings.” On the left side, you’ll see “Settings for my Calendars,” where you can click on your calendar. Scroll to “Event Notifications” and click “Add Notification.” You have a choice of whatever suits you best — but be aware that you can add multiple reminders. For example, you can set a 30-minute reminder and a 10-minute reminder.

NEED A DAILY AGENDA? Google has an option to receive a list of your calendar events as an email each morning. If you’d like to enable that, go to “Settings for my Calendars” (see above). Then, under “Other Notifications,” find “Daily Agenda” and select “Email.” 

ADD ATTACHMENTS TO EVENTS. When creating a calendar event, there is a space to enter notes. Click the paper clip icon to add an attachment . This can, for instance, help your study group members have access to the same information via their calendars.

FURTHER RESOURCES 

Google Support. “Get Started With Google Calendar.” 

Alexander, Anson. “How to Use Google Calendar Effectively in 2023.” YouTube. 2023.

Start the term well organized (1.1)

Stalled poster 1.1 (text is pasted below)

SCHEDULE EVERYTHING. Create a Google Calendar (or other digital, or heck, even paper, calendar). Record class times, athletics practice, club meeting times, and everything else that is regularly scheduled. Make sure to cover the whole term, and add assignment due dates as well as test dates. If dates change, change them in your calendar ASAP!

Include social and family events, birthdays, and holidays, too. Update the calendar as new events arise, and check it every day to plan your time.

COLOR YOUR WORLD. Use color coding in your calendar to help you see more quickly what tasks are particularly important. For instance, you might use red to indicate assignment due dates or test dates, and blue for athletic events — or a different color for each class.

LOOK AHEAD. Check the syllabus of each of your courses to make sure you know when your finals take place. The last thing you want is to plan to return home or take a trip when you have a final scheduled!

PLAN “BACKWARDS.” Once you know the due dates for projects, essays, reports, presentations, and other large tasks, break each one down into component steps and plan backwards.

For example, if an essay is due March 15, then you should have it proofread by at least March 14. That means that you should have a full finished draft by March 13, which in turn suggests that a rough draft should be done by March 11 or so. If you want to book an appointment with the Farnham Writers Center or a subject tutor, you will do well to book one as soon as possible.

© 2026 Stalled

Theme by Anders Noren — Up ↑