The final steps in making a book are making the case, which forms the cover of the book, and gluing the book block into the case. This is not the only way of binding a hardcover book, but it’s the most common and the simplest, so it’s the way I chose to do it.
The first thing to do in making a case is to cut out the boards that will make up the front and back covers of the book. I used binder’s board for this, which is a dense, archival cardboard designed to be used as the covers for books. It comes in very large sheets and so I needed to cut two pieces that were each slightly larger than the size of the book block. All I had to cut it with was a box cutter, and since the cardboard is very dense, it took me a long time to cut through it.

Once I had two boards cut, I was almost ready to move on to cutting the cloth. Before I did that though, I had to make a gauge for measuring the distance between the two boards. I put the boards on either side of the book block the way they’d sit when the book was finished, and then I wrapped a piece of paper around the outside, marking the distance between the two boards. I then used that measurement to cut a piece of cardboard that would sit between the boards to mark off the correct spacing.

With that finished, it was time to cut the cloth. I used pre-made book cloth for this, which is a thin fabric backed with paper so that it can more easily be glued to the boards.

I laid the boards out at the appropriate distance, made sure they were square with the fabric, and marked off about ¾ of an inch from each edge to give space for folding it over the boards. I then took the boards off and cut the fabric to size.

The last thing to do before assembling the case was to cut more lining paper. This piece is used to line the spine of the case, and bridges the two boards to reinforce that part of the case, since there’s no board there. This paper needs to be the size of the boards and wide enough to cover the spine and run about an inch onto each board. With that done, I had all of the pieces I needed for putting the case together.

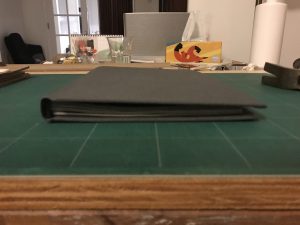
The process for assembling the case is relatively straightforward. I applied glue to the entirety of the back of the fabric and then I placed the boards on the marks I had made. I smoothed them down and then I put glue on the lining paper and put it over the gap and onto the boards. I then snipped each of the corners of the cloth. I folded up the long edges and smoothed it down over the edge of the board. I then turned it to the short sides and folded the short edges of the cloth over the edge of the board. With that done, I put the book block inside the case and closed it inside. I set the hinge at the spine and then let the case dry with the book inside.
Once the case was completely dry, I was ready to glue the book into the case. This process is pretty simple, but the stakes are pretty high. If the book fails at this point, there’s not much that can be done to fix it. I put the case down on top of a board with the book inside it, and mixed up some glue. I opened one side of the case and brushed glue across the whole endpaper as well as the cloth and the tapes. After that I closed the book and pressed it down, then I flipped it over and did the same thing on the other side. I added a little more glue to make sure the paper stayed down on the board, and then I left the whole thing to dry under some weight, to make sure it all held together.

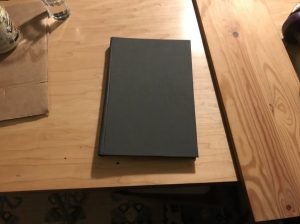
Once that was dry, the book was finished. It’s far from perfect but I’m pretty pleased with it for a first attempt.
This was a really interesting project, and it didn’t just teach me all of the steps that go into making a book, and what needs to be done for them to work, but I also learned a lot about the points of failure. From now on when I look at a book, especially a book that was bound by hand, I’ll be able to understand the steps that went into getting it to look the way it does, but also what might have happened to it since it was bound. On top of that, I also just have a much deeper understanding of the amount of thought, labor, and training that goes into binding a book.
As always, the tutorials I used are available here: Part One and Part Two.