Format, sketch, carve, print, print again, fold, stabstitch, cut, … and a quarto is born! During my final project, I really enjoyed going through the steps of the printing process and learned a lot along the way. I faced some challenges, had to overcome some learning-curves, got close to making big slip-ups, and covered my floor in wood shavings, but came out with a nice memento of my trip to Amsterdam over JanPlan.
Picking a Topic and Images
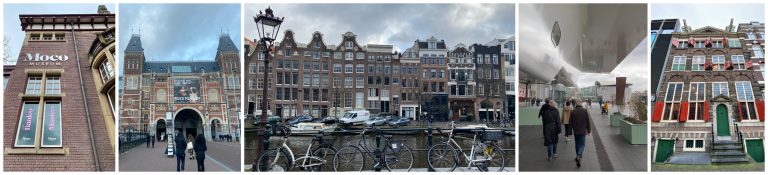
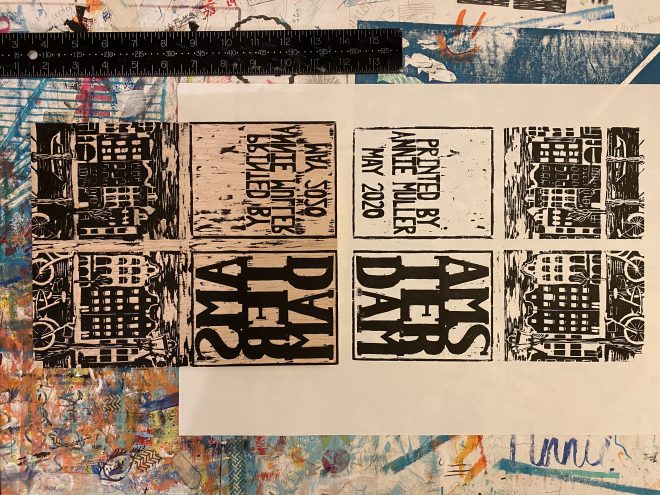
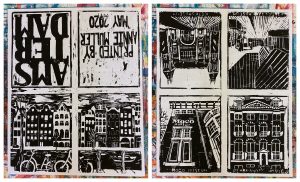
During JanPlan, I traveled to a few European cities with my roommate, and for the quarto, decided to focus on our time in Amsterdam–the final, and my favorite, stop of the trip. After settling on a topic for the quarto, picking the images to include came next. I wanted the quarto to be mostly images because I thought carving images would be relatively easier that carving letters. These are the 5 pictures I decided to print, with the center canal landscape split between page 4 and 5 in the centerfold (figure 3). These images make up pages 2-7 (out of 8). The first page will be the title page with “Amsterdam”, and the last page will be a colophon with the text “printed by Annie Muller, May 2020”.
Formatting

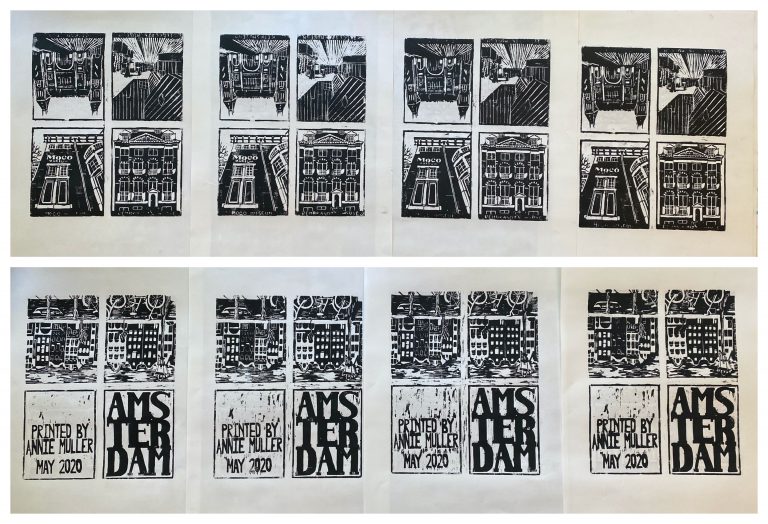
The first step in making this book was formatting. With my single 8×10 woodblock, the quarto format made the most sense to maximize page size and quantity. I carefully formatted four pages on each side of the block (which is thick enough to carve on both sides). This step required many considerations and foresight into the printing process: I had to leave thick enough margins to keep images out of the gutter, enough space at the tops of the pages where the folded quarto is cut, and I had to ensure that all the pages would be in the correct order with the correct orientation. I made practice books with the measured page sizes to check margins (figure 6) and I also put the formatting into my computer and printed double-sided to ensure that the orientation and order of the pages were correct (figures 7-12).


Formatting this book taught me a lot about the printing process. There were many considerations to be made for this eight-page quarto to be printed well; I can’t imagine formatting on a bigger scale such as for the thousand-page books printed by Gutenberg. This proves the importance of all the tools to make formatting easier, such as the chase with its furniture and quoins to make margins. After formatting this book, I have a greater appreciation for the skill of a compositor and their understanding of how to format a page quickly and effectively.
Prepping the Images
Before beginning to carve, I needed to sketch the images and transfer them onto the block. In my sketches, I simplified the shapes and left out details or figures to make them more conducive to a woodcut. After a quick sketch (figure 13), I used parchment paper to transfer the mirror of the image onto the wood block (figures 14-18). As I transferred the mirror images, I also had to ensure that I was placing them mirror to the formatting plan I made. This was something I constantly triple-checked throughout the process.
Making a Woodcut
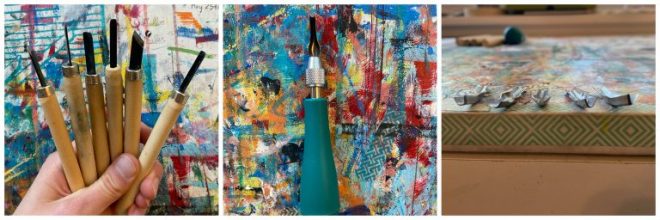
Carving the woodcut was a fun but time-consuming, sometimes cathartic but sometimes stressful, and difficult but definitely rewarding process. I have experience in relief printmaking with linoleum, but wood is a much less forgiving material and the techniques of linocuts are barely applicable to woodcuts. To cut against the grain and avoid splintering, I used a small knife to first cut a path, and then used one of the gauging tools (figure 19). Cutting with the grain, I had to be careful to not get the tool too deep into the wood. Woodcuts require much more force and therefore much more control of the tools than linocuts; in linoleum, the tools run smoothly through the block in all directions. This complication gave me a greater appreciation for woodcuts because of the energy and care they require; more force means a greater probability for the tool to skip, and the increased complexity of the grain means every cut requires more careful attention and planning. As I would finish a day of carving the woodblock, a soreness in my wrists and forearms told me I was working new muscles, and a permanently sore thumb attested to the pressure required for every cut.
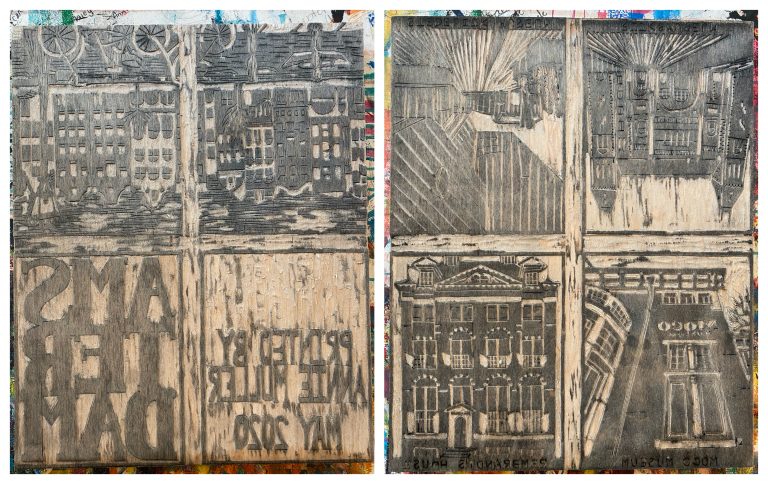
After carving the woodblock (figure 20), now when I look at a book with woodcuts, I can understand the craftsmanship that went into their production. The three-dimensional, sculptural process of a woodcut is no longer lost to me when looking at a two-dimensional page. Making a woodcut myself has given me a greater appreciation for the people who made the woodcuts, who in turn made Chinese books and all early illustrated books possible. The history of the book is a history of people who made books; the papermakers and printers and binders, to the compositors and woodcutters. After carving this woodblock, I’m another step closer to understanding the human story of how a book is made.
Printing Round One
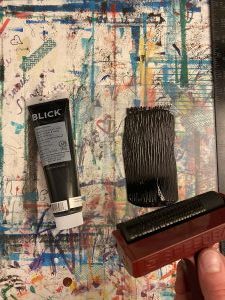
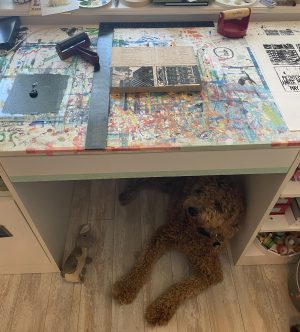
After having formatted and carved the woodblock, I was ready and excited to see how it translated into a printed image. This was the moment of truth. To print my woodblock, I used a black, water-soluble printing ink and brayer to roll the ink onto the block (figure 1). This step was much slower than I anticipated; I had to be careful to cover the printing surface in enough ink to print evenly, but not too much ink which would smudge the finer details. From round one, I also had to be conscious of how I placed the paper on the block, so that I could repeat this to make the front and back of the pages aligned. I used a square-edge flush with the block for registration, I then aligned the top left corner of the paper with the top of left corner of the square edge, and then rolled the paper onto the block. This makes my margins with the edge of the paper uniform, so that I will be able to make the same margins when I print on the other side of the paper. With the paper registered correctly with the block, I then used a baren (figure 3) to apply pressure and help transfer the ink onto the paper.

Printing Round Two
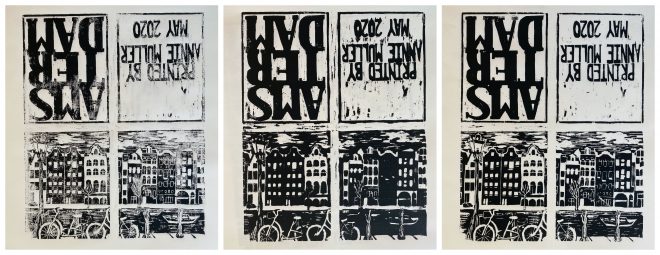
After pulling the first series of prints and allowing them to dry, I printed the other side of the wood block onto the other side of the paper. Using the same square-edge, I was successfully able to align the front and back of the pages (while also referring to my formatting plan to make sure the orientation of the block was correct). When using the baren, I placed a sheet of paper underneath the paper to avoid smudging the first printed side. After this step, I had four sheets of double-sided prints (figures 25-26) ready to be made into little books!
Video of the second round of printing
Printing the woodblock improved my understanding of the printing process and greatly increased my respect for the beaters (those who inked the type) and pullers (those who worked the press) and the technology that was developed to make printing easier. I had a tendency to either over-ink or under-ink the block (figures 27-28) before I finally found the goldilocks amount. One day I hope to have an opportunity to try a pair of ink balls to spread ink instead of the brayer so that I can have a feel for how that technique better produced an even layer of ink. While printing the block, I was also wishing I had a printing press to apply even pressure; the baren was difficult to use and required great effort to apply enough pressure to the entire surface of the paper. After printing the woodblock by hand, I have a better understanding of how the printing press and division of labor in the printshop helped make the book printing industry possible.
Folding, Stab-stitching, and Opening the Quarto
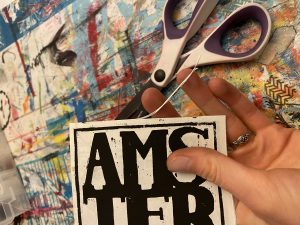
Once the second round of printing dried, it was time to fold, stab-stitch and cut open the quarto! First, I trimmed the paper down to the image, leaving a small margin (figures 30-31). Next, the page needs to be folded twice, both times the short way, aka “hamburger style” (figures 32-34). Next, I hand-sewed the left edge of the uncut quarto using a needle and white cotton thread. Lastly, I trimmed off a little part of the top fold to open up the pages (figure 35). Finally, the quarto was complete and functioning as a little book. I’m really excited about the final product, and I hope to print and sew a couple more to add to this edition.


The process of creating this quarto was very rewarding. I loved every step from the formatting to sketching to carving to printing to stab-stitching. Finally getting to the last step of cutting open the pages was so exciting, and I was very happy to see the final product with everything in order. After going through the steps of the printing process, I have a deeper understanding of the work that goes into the many steps of the printing process. When I next look at a book from the hand press period, I will be able to look at it with this deeper understanding of the processes and the hard work of the humans that made it possible.